There is always a gimbal for every great camera on the market. You have to ensure that you are getting the one that is best for your camera. We are here to help you do exactly that.
Among many great camera brands, one brand that you will often come across is Sony, and today we are going to talk about two cameras from Sony A9 and A9 II. Both of these cameras are quite worthy cameras, and for such a worthy camera, you will require a gimbal that is equally worthy.
There are a variety of gimbals available for Sony cameras, and the best one for you will depend on your specific needs and budget. Some popular options include the ones we have mentioned in this article. But before we head forward and look into the gimbal, let us have a quick look at both of the cameras,
Note
All the gimbals mentioned here are tested with Sony A9 and A9 II and work perfectly fine.
| DJI RS 3 (Best Overall)
    |
| DJI RS 3 Pro (Most High-end - Highest Payload Capacity & Comes with Advanced Features)
    |
| DJI RS 3 Mini (Budget Pick)
    |
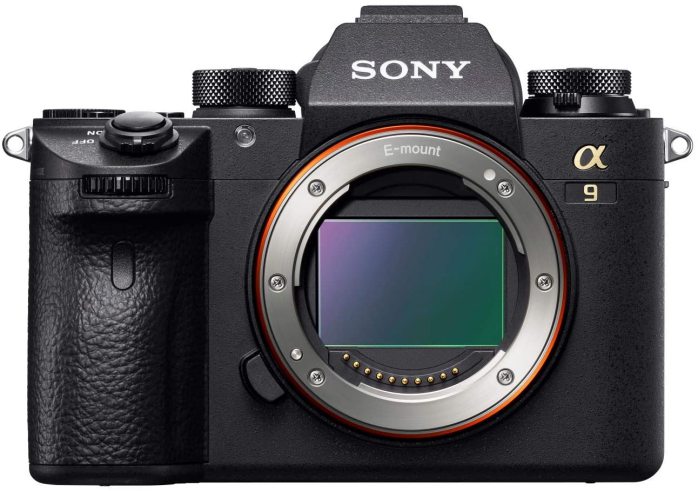
Sony A9
The Sony A9 is a full-frame mirrorless camera that was released in 2017, and recently in 2019, they launched a new firmware for the camera, making it even better. It is considered to be a flagship model for Sony and is aimed at professional photographers and videographers.
One of the key features of the Sony A9 is its fast shooting speed. It has a continuous shooting rate of up to 20 frames per second with no blackout, which makes it ideal for capturing fast-moving subjects such as sports and wildlife. It also has a high-resolution electronic viewfinder and a 3-inch tilting touchscreen LCD.
The Sony A9 also has advanced autofocus capabilities with 693 phase-detection points that cover 93% of the frame. It also has real-time tracking and real-time Eye AF, which allows it to focus on a subject’s eyes even when they are in motion.
This makes it ideal for capturing fast-moving subjects such as athletes and wildlife. The camera also has 5-axis in-body image stabilization, which allows it to produce sharp images and videos even in challenging environments. It can shoot 4K video at up to 30 frames per second and has a robust body construction that is weather-sealed.
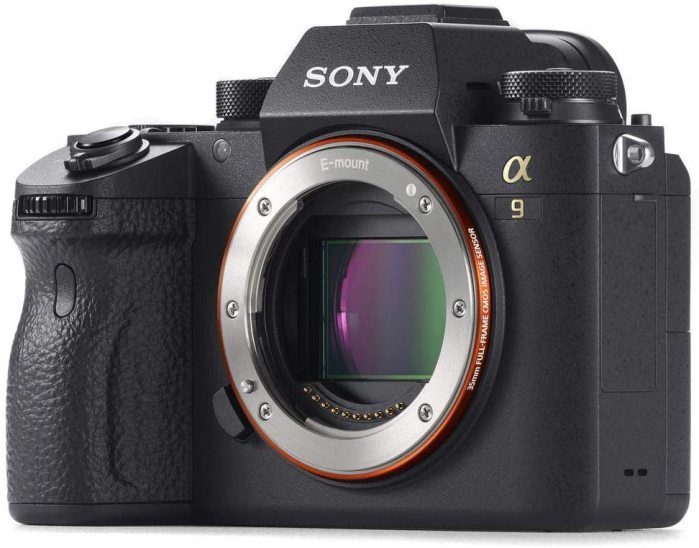

Overall, the Sony A9 is a powerful and versatile camera that is well-suited for professional photographers and videographers. It has advanced autofocus capabilities, fast shooting speeds, and robust construction, and is capable of capturing high-quality images and videos. However, it’s important to note that it was released in 2017 and it has been surpassed by the Sony A9 II in some specs.
- The sensor of the Full-frame 24.2-megapixel Exmor RS CMOS
- Image Processor- BIONZ X
- Autofocus system- 693 phase-detection points covering 93% of the frame, real-time tracking, and real-time Eye AF
- Continuous shooting speed- Up to 20 fps with no blackout
- Video resolution- 4K at 30 fps
- Viewfinder- 0.5-inch OLED with 3,686,400 dots
- LCD 3-inch tilting touchscreen with 1,440,000 dots
- Connectivity- Wi-Fi, Bluetooth, NFC, USB-C, HDMI
- Storage- Dual card slots (1x SD UHS-II, 1x CFexpress Type A)
- Battery Life- Up to 480 shots per charge using EVF and 650 using LCD
- Weather sealing- Yes
- Dimensions- 127 x 96 x 63 mm
- Weight- 673g
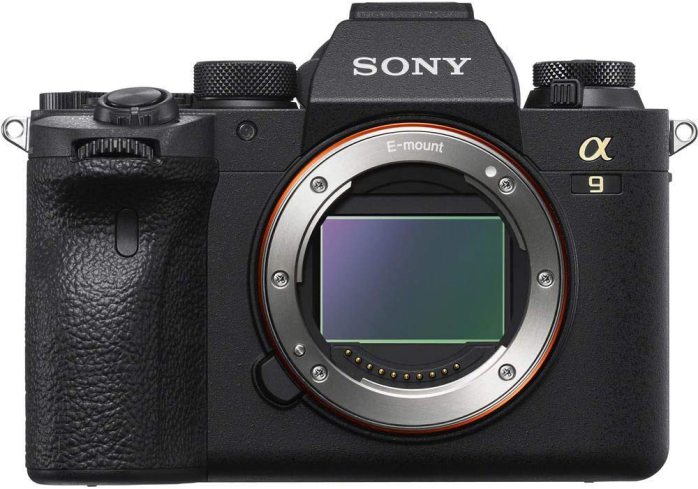
Sony A9 II
The Sony A9 II is a high-end mirrorless camera that is well-suited for professional photographers and videographers. It has a full-frame sensor with a resolution of 24.2 megapixels and can shoot at a continuous rate of up to 20 frames per second with no blackout.
It also has advanced autofocus capabilities with 693 phase-detection points that cover 93% of the frame, making it ideal for capturing fast-moving subjects.
The camera also has 5-axis in-body image stabilization and can shoot 4K video at up to 30 frames per second. It also has a robust body construction and is weather-sealed, making it suitable for use in challenging environments.
Additionally, it has dual card slots, one UHS-II SD and one CFexpress type A, to provide more flexibility in terms of storage.
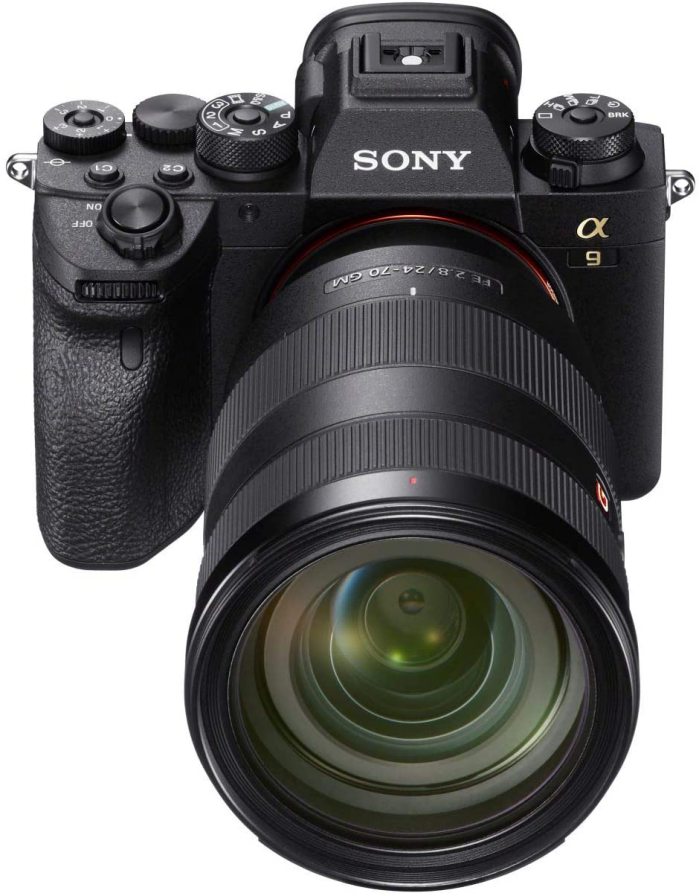

One of the most notable features of the Sony A9 II is its advanced autofocus system. It has real-time tracking and real-time Eye AF, which allows it to focus on a subject’s eyes even when they are in motion. This makes it ideal for capturing fast-moving subjects such as athletes and wildlife.
In conclusion, the Sony A9 II is a powerful and versatile camera that is well-suited for professional photographers and videographers. It has advanced autofocus capabilities, fast shooting speeds, and robust construction, and it is capable of capturing high-quality images and videos.
- Sensor- Full-frame 24.2-megapixel Exmor RS BSI stacked CMOS
- Image Processor- BIONZ X
- Autofocus system- 693 phase-detection points covering 93% of the frame, real-time tracking, and real-time Eye AF
- Continuous shooting speed- Up to 10 fps with a mechanical shutter, up to 20 fps with silent shooting or electronic shutter
- Video resolution- 4K at 30 fps, Full HD 1080p at 120 fps
- Viewfinder- 0.5-inch OLED with 3,686,400 dots
- LCD- 3.0-inch TFT touchscreen with 1.44 million dots
- Connectivity- Wi-Fi, Bluetooth, NFC, USB-C, HDMI
- Storage- Dual card slots (1x SD UHS-II, 1x CFexpress Type A)
- Battery Life- Up to 500 shots per charge with EVF and 690 shots with LCD
- Weather sealing: Yes
- Dimensions: 5.07 x 3.8 x 3.05 inches
- Weight: 678g
Although there are so many similarities between these two cameras, there are also some differences between the two, let us have a look at them,
- Continuous shooting speed- The A9 II has a continuous shooting speed of up to 10 fps with a mechanical shutter, and up to 20 fps with silent shooting or electronic shutter, whereas the A9 has a continuous shooting speed of up to 20 fps with no blackout.
- Video Resolution- The A9 II can record 4K video at 30fps and 1080p video at 120 fps, whereas the A9 can record 4K video at 30fps.
- Joystick- The A9 II has a joystick that allows the user to move the focus point and navigate the menu, and the A9 doesn’t have it.
- Durability- The A9 II has improved durability, featuring a more robust shutter mechanism and reinforced body structure.
- Firmware updates- The A9 II is expected to receive firmware updates for longer than the A9, which was released in 2017.
- Battery life- The A9 II has a longer battery life which is 500 shots per charge with the EVF or 690 shots with the rear LCD.
- Connectivity- The A9 II has an Ethernet port for wired network connections and FTP file transfer.
- Price- The A9 II is generally more expensive than the A9, reflecting its upgraded features and improved durability. A9 costs $2,379.95, and A9 II costs about $4,498.
It’s crucial to note that both cameras are high-end versions and have many things in common, but the A9 II has certain improvements over the A9, including faster continuous shooting, longer battery life, and the addition of a gimbal for easier control. Now that you know everything you need to know about both of these cameras, let us tell you why you need a gimbal for these amazing cameras,
Gimbals come in different types and prices. To ensure that you are getting the best gimbal for your A9 and A9 II, let us have a look at different gimbals that we have tried and tested for Sony A9 and Sony A9 II.
Best Gimbals for Sony A9 & A9 II
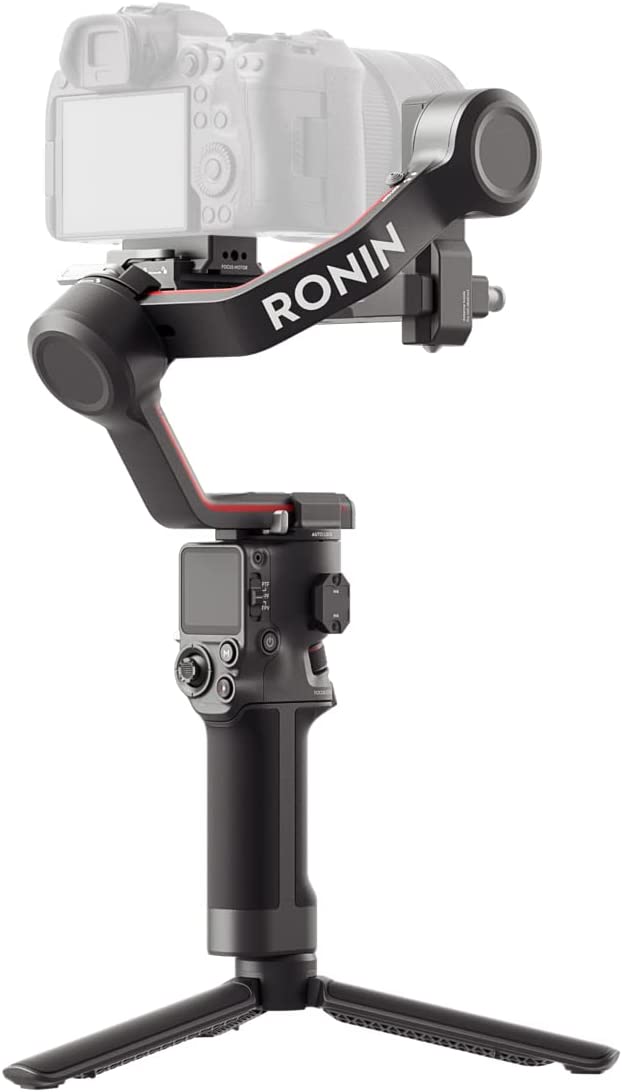
1. DJI RS 3 – Best for Sony A9
DJI RS 3 is a professional-grade 3-axis gimbal designed to work with a wide range of mirrorless and DSLR cameras. One of the key features that we adore about this gimbal is its high payload capacity, and it can support cameras up to 3 kg, which is more than enough to support the Sony A9 camera.
The DJI Ronin app is perfect to be used to control the gimbal’s many shooting modes, which include panoramic, time-lapse, timewarp, and many more.
It also has a strong and durable build that can withstand the most rugged environments. RS 3 also has a built-in focus wheel and a joystick for easy control of the camera’s movement. You will appreciate its design as it helps a big deal in easy setup and use.
The gimbal can be balanced in minutes, and the control buttons are intuitive and highly user-friendly. That is almost everything any photographer and videographer needs. We are also impressed with its long battery life, which lasts up to 12 hours.
In simple words, the DJI RS 3 is a professional-grade gimbal that is designed to work with many different sets of cameras, but most importantly, it will work amazingly with Sony A9. Both of them together offer smooth and stable footage, a variety of shooting modes, and durable construction.
DJI RS 3 also has easy controls, long battery life, and an easy setup. They are great for photographers and videographers looking for a high-quality gimbal that can support their professional needs.
The Sony A9 is a high-end camera with advanced autofocus capabilities, fast shooting speeds, and long-lasting construction, so it’s a great match for the DJI RS 3.
The gimbal will help produce smooth and stable footage, and the camera’s advanced autofocus system will allow you to capture fast-moving subjects with ease.
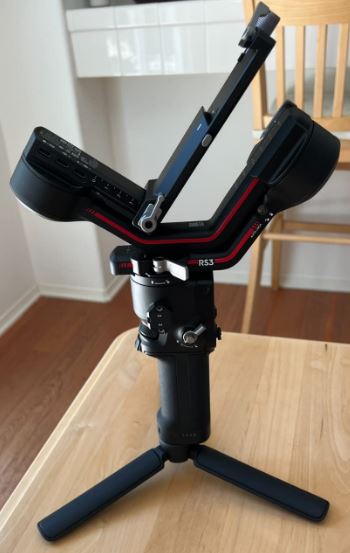

There are some key features of this gimbal that will help you know the gimbal even better,
Dynamic Zoom With the dynamic zoom feature, you can control the zoom speed and zoom in and out smoothly and silently, making it perfect for video recording.
Versatile shooting modes- The gimbal has a variety of shooting modes, such as panorama, time-lapse, and timewarp, which can be controlled via the DJI Ronin app.
Easy setup- The gimbal is designed for easy setup and use, it can be balanced in minutes, and the control buttons are intuitive and easy to use.
Customizable- The gimbal can be customized to suit individual needs and preferences, with the ability to change the settings and parameters.
Wireless Control– The gimbal can be controlled wirelessly via the DJI Ronin app, which allows for easy control of the gimbal and camera from a mobile device.
Pros
- Great payload capacity
- Many shooting modes
- Long lasting build
- 12 hours of battery runtime
- Easy to use and set up
- Can be controlled remotely
Cons
- Price can be one of the constraints for you
- It is a bit big in size
2. DJI RS 3 Pro – Best for Sony A9 II
We have yet another gimbal from DJI, which fits perfectly with Sony A9 II; it is none other than DJI RS 3 pro. In terms of design, the RS 3 Pro is smaller and lighter than its predecessor, the RS 2, which makes it more portable and easy to carry around.
The gimbal also has a new locking system that makes it easier to balance and set up and also helps to improve stability. Among many different things that this gimbal offers, you will always appreciate its payload capacity, which is more than impressive to be used with Sony A9 II.
If you are a professional videographer or a photographer, you will admire this gimbal because it can hold cameras weighing up to 4.5 kg.
Its long battery life of 12 hours is definitely everything you need your gimbal to be. The RS 3 Pro is more compact and lightweight in terms of design than its predecessor, the RS 2, making it more transportable and simple to carry.
The gimbal also includes a new locking system that helps to increase stability while also making it simpler to balance and set up.
This gimbal is just impressive as it also supports the LiDAR AF system without breaking a sweat. When in use, the level of professionalism this new gimbal gives you is beyond impressive.
The DJI Ronin RS 3 Pro surpasses its competition as the best gimbal. You will also adore this gimbal as it ensures that you can use it with just one hand. Although it costs a lot more than you would comprehend, the money you spend on this gimbal will definitely be worth it.
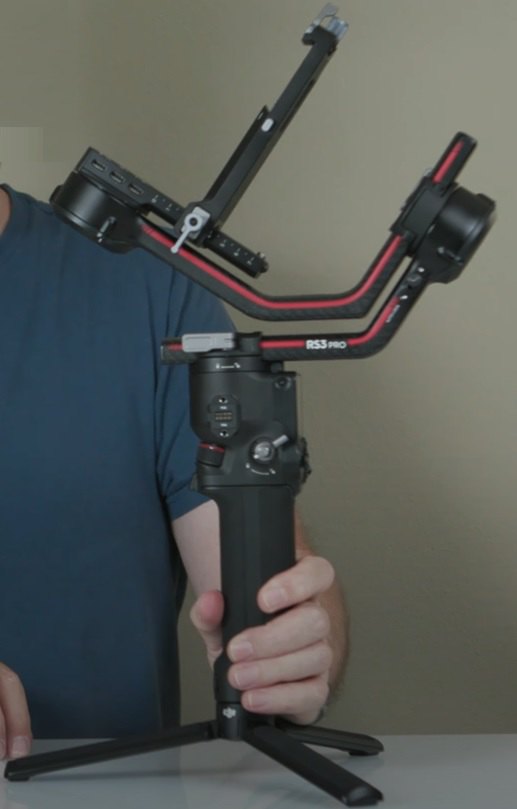

Let us get to know its few key features in brief,
Easy control- The gimbal has an integrated focus wheel and joystick for simple camera movement control, making it simple to record footage that is smooth and stable.
Lightweight- As it is lightweight, you will be really happy to capture some of the best shots out of it.
Great payload capacity- RS 3 pro has a great payload capacity which is enough for the Sony A9 II. It can hold a payload of 4.5 kg.
Many different shooting modes- That is the main reason that you use a gimbal is to get the best performance out of your camera. With many different modes of shots, you will get the most cinematic results.
Pros
- Many different shooting modes
- Compact and lightweight
- Easy to setup your camera on it
- 12 hours of battery life
- Effortless wireless control
- Great payload capacity
Cons
- Costs a bit too much
- Getting a balance on full payload can be an issue.
3. DJI RS 3 Mini
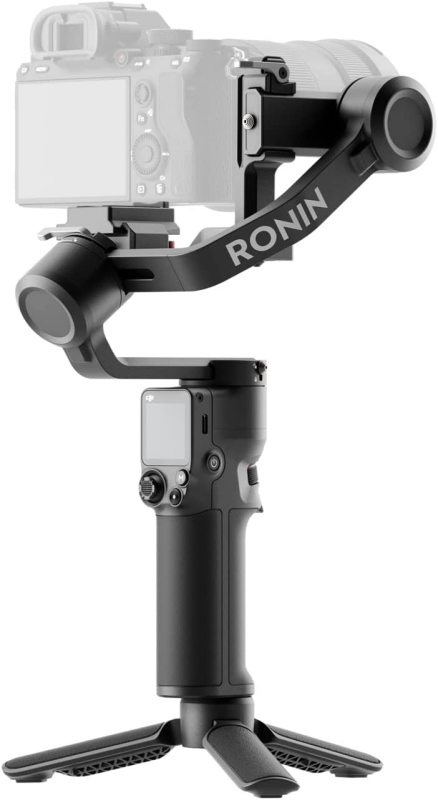
Among many different gimbals, you will appreciate this extremely compact and easy-to-carry anywhere gimbal. The DJI RS 3 Mini is a compact, lightweight, and portable gimbal stabilizer designed for mirrorless and DSLR cameras.
It features a 3-axis gimbal for smooth and highly stabilized footage and is compatible with a wide range of cameras and lenses. The RS 3 Mini also has a built-in color screen and can be controlled using the DJI Ronin app.
It also has a quick-release plate and multiple mounting points to make it easy to switch between different setups. It’s ideal for videographers and photographers looking for a high-quality, portable gimbal stabilizer.
DJI RS 3 Mini is a popular product among photographers and videographers and generally receives positive feedback. Users praise its compact and lightweight design, making it easy to transport and use on location.
They also appreciate the stabilizing performance, smooth footage, and built-in color screen. Some users also find it easy to set up and balance their camera with the gimbal. However, as with any product, there are also some criticisms and negative feedback.
Some users have reported issues with the battery life, and some have found it hard to balance the camera on the gimbal. Some users have also reported that it can be difficult to control the gimbal when used with heavy cameras and lenses.
Overall, the DJI RS 3 Mini is a high-quality gimbal stabilizer that is well-regarded by many photographers and videographers. DJI RS 3 Mini is highly compatible with the Sony A9 camera, a professional mirrorless camera known for its fast autofocus and fast continuous shooting. The camera’s lightweight and compact design pairs well with the RS 3 Mini Gimbal Stabilizer.
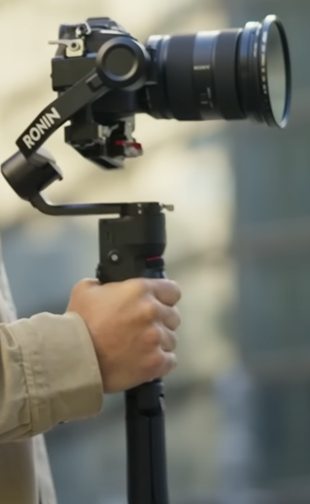

Now it’s time that we show you some of the best features that this gimbal has to offer,
The 3-axis gimbal delivers smooth footage, which is highly stabilized by stabilizing the movement of your camera.
Compact and portable design- Ideal for use on location, be it rugged or smooth, you will always get highly stabilized results.
SmoothTrack technology- Allows for smooth and accurate transitions between different movements.
Advanced control algorithm- Provides high-precision stabilization and low-noise operation.
Pros
- Highly compact and lightweight gimbal
- Build-in color screen to maintain it easily
- 12 hours of battery time
- Highly stabilized performance
- 3-axis stabilization
Cons
- Difficult to control when used in the full payload
- The price is a bit high compared to the other gimbals with the same features.
There are many benefits of using a gimbal with your cameras. If you are wondering why you should use a gimbal for your camera.
Why do you need a gimbal for the camera?
- Smooth and Stabilized results- A gimbal prevents unintentional camera movement using motors and sophisticated algorithms, producing footage that is stable and fluid. Using a gimbal is always a wise choice when you need highly stabilized results.
- Extreme flexibility- Gimbal enables you to move the camera in various directions while maintaining stability, which can expand the creative possibilities for your stills and videos.
- Reduced shake and blur– A gimbal helps to reduce shake and blur caused by hand-held camera movement, which can result in clearer and more professional-looking footage.
- Enhanced image stabilization- A gimbal can provide more advanced stabilization than the in-camera image stabilization system, especially in challenging conditions such as low light or fast-moving subjects.
- Versatility- Many gimbal stabilizers have multiple operation modes and can be used for different types of photography and videography, including moving timelapse, panoramic shots, and tracking shots.
So by now, we know that you know how a gimbal can be used to stabilize a camera or other device by compensating for unwanted movement.
This can result in smoother and more stable footage, which can be particularly useful in situations where the camera is being moved manually or in windy conditions. Additionally, gimbals can also allow for more creative camera movement and shot options.
We will now give you a few tips that will be helpful to you irrespective of the fact whether you have been using it before or you are using it for the first time,
Tips for using a gimbal with your camera
- Balance your camera- Make sure your camera is properly balanced on the gimbal before turning it on. This will ensure smooth and stable movement. If your camera is not properly balanced, there is a high chance that you will not get the highly stabilized results that you are supposed to get.
- Use the right settings- Adjust the settings on your gimbal and camera to match the type of shot you’re trying to capture. For example, if you’re shooting in a low-light situation, use a slower shutter speed. If you want to use a certain kind of mode, you ensure that your gimbal and your camera are properly set in the settings it is required to capture the shot. It is one of the basic things that you can look out for if you are just getting your hands on a gimbal.
- Be aware of your surroundings- Keep an eye out for obstacles that could interfere with the movement of your gimbal. Also, be mindful of the environment and weather conditions, as they can affect the performance of your gimbal. You can always make a plan for how you are going to capture your stills and your videos before you actually start capturing the shot.
- Use the right accessories- Some gimbals are compatible with additional accessories like external batteries or focus or zoom controllers, which can greatly enhance your shooting experience. You always have to use different accessories as per the requirement of what you are capturing. It will enhance the quality and cinematic experience of whatever you are capturing.
There are a few more questions that might come to your mind, and we are here to give you all the information you might require to get to know your camera and gimbal even more.
On a high note, you need to ensure that there is a difference between mounting your camera on a gimbal and balancing it. Mounting does not mean that you will definitely get the correct balancing, so here are some tips for both.
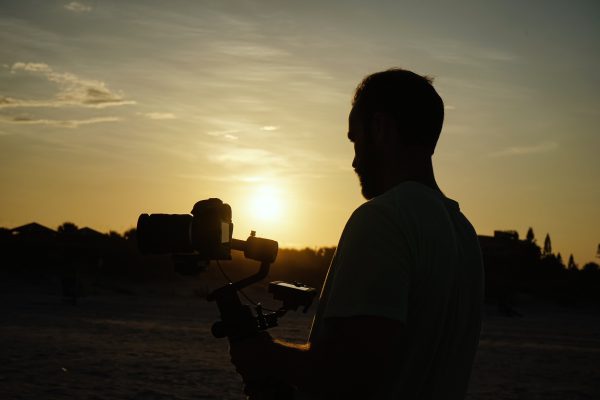

How to mount your camera on a gimbal?
- Make sure the gimbal is turned off and in the proper orientation for mounting your camera.
- Loosen the thumbscrews or clamps on the gimbal that hold the camera in place.
- Carefully place your camera onto the gimbal, aligning it with the roll axis and the pitch axis.
- Tighten the thumbscrews or clamps to secure the camera in place.
- Power on the gimbal and use the controls to balance the camera. This might require moving the camera slightly or adjusting the settings on the gimbal.
- Once the camera is balanced, you’re ready to start shooting.
It is also important to note that the exact steps to mount a camera on a gimbal may vary depending on the specific model of the gimbal you are using. It’s always recommended to refer to the manufacturer’s instructions for more detailed instructions.
Final Thoughts
In conclusion, using a gimbal with a Sony A9 and A9 II camera can greatly enhance your shooting experience by providing stable and smooth footage, as you might have learned so far in the article.
The Sony A9 and A9 II are high-performance cameras that are well suited for use with a gimbal. When using a gimbal with a Sony A9 or Sony A9 II, it’s important to properly mount and balance the camera, as well as use the right settings and accessories for the desired shot.
With the correct use, a gimbal can open up a new level of creative possibilities for your Sony A9 camera.
We hope this article helps you achieve the desired results that you need out of the gimbal attached to either Sony A9 or Sonu A9 II cameras.

